Add Row
Add Element
HOME SERVICE HUB
Add Element
  • Home
  • Categories
    • Smart Home Solutions
    • Gardening
    • Landscaping
    • Home Exterior
    • Outdoor Living
    • Smart Homes
    • Lawncare
    • Lighting Solutions
    • Plumbing Tips
  • Featured Business Profiles
Add Row
Add Element
June 30.2025
3 Minutes Read

Unlock The Secrets to Picking Banana Peppers for Culinary Deliciousness

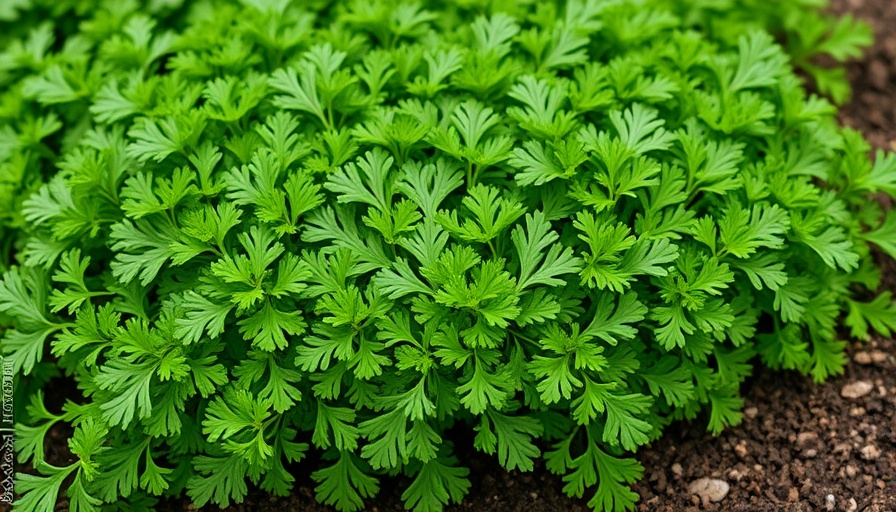
Vibrant green parsley leaves growing in a garden setting

The Perfect Time: When to Harvest Banana Peppers

If you've planted banana peppers in your garden or containers, timing is everything when it comes to harvesting. With various types of banana peppers available—each offering distinct flavors and culinary uses—knowing when to pick them can significantly enhance your overall yield and the quality of your produce. Here’s a guide on how to determine when your banana peppers are ripe for the picking.

Understanding the Lifecycle of Banana Peppers

Banana peppers are not only easy to grow, but they also bring a splash of color and flavor to any dish. Typically tropical plants, they require a warm climate to thrive. Starting seeds indoors requires careful planning—about 70-80 days before you expect to harvest, especially if you’re beginning from seed. By monitoring growth, from seedlings to first blooms to ripe fruit, you will gain a deeper appreciation for the cultivation process.

Key Indicators: How to Tell When Banana Peppers Are Ready

When it comes to determining the ripeness of your banana peppers, several clues can guide you:

  • Days to Maturity: Generally, banana peppers take around 70-80 days to reach their mature stage, but this duration varies by variety. Keeping a calendar helps you track this crucial timeline.
  • Fruit Size: Most mature banana peppers fall within a size range of five to eight inches. If you’re unsure about whether to harvest a specific pepper, measure it regularly. When growth stagnates, that’s your cue.
  • Color Changes: The transformation from pale green to vibrant yellow—or even an orange-red hue—indicates ripeness. The sweet variety is best when bright yellow, while hot banana peppers achieve full heat only when their color is fully developed.
  • Texture and Firmness: Ripe banana peppers should feel firm with smooth, glossy skin. Any signs of wrinkling or a squishy texture are indicators that the pepper has overripe.
  • Taste and Aroma: The flavor profile of ripe banana peppers is sweet and tangy, and they should emit a pleasant aroma. Hot varieties will offer a nuanced sweetness with heat.

The Benefits of Knowing When to Pick

Selecting ripe banana peppers at the right time can enrich your culinary experiences. For instance, if you’re planning to pickle or use them in salads, picking them at the sweet yellow stage is advisable for optimal flavor and crunch. It’s not just about quality; it's about versatility in cooking options.

Future Trends in Home Gardening

As the trend of home gardening continues to rise, particularly among homeowners looking to cultivate their own produce, understanding the intricacies of harvesting time becomes even more critical. Not only do banana peppers offer nutritional benefits, but they also contribute to sustainable living by reducing food miles. With advancements in home gardening techniques and urban gardening becoming popular, aspiring gardeners can leverage resources—from online forums to local gardening clubs—to enhance their growing skills.

Put Your Knowledge to Use: Tips for the Seasoned Gardener

For those seasoned in gardening, the time it takes to perfect your banana pepper harvest is also an opportunity to experiment with different varieties. Explore heirlooms alongside hybrids for diverse flavors. Cultivating banana peppers can be an enjoyable venture if paired with proactive care, such as adequate watering and pest management. The right techniques will help cultivate a bountiful harvest.

With the right knowledge, anyone can enjoy the process of growing banana peppers. Keep track of these valuable indicators for optimal results, making your gardening experience both productive and rewarding.

Conclusion: Harvest Your Way to Culinary Success

By mastering the art of knowing when to pick banana peppers, not only will you maximize your garden yield, but you will also enrich your meals with fresh ingredients. Experiment with this versatile pepper to create a range of dishes that can impress your family and friends. Start today, and enjoy the satisfaction that comes from home gardening!

Landscaping

1 Views

0 Comments

Write A Comment

*
*
Related Posts All Posts
07.04.2025

Transform Your Garden: Growing Rattlesnake Pole Beans for Flavor & Yield

Update Discovering Rattlesnake Pole Beans: A Gardener's Delight Rattlesnake pole beans (Phaseolus vulgaris) are more than just a visually captivating addition to your garden. These heirloom beans are well-known for their vigorous growth and high yields, making them a favorite among gardeners looking for something both beautiful and delicious. Not only do the dark green pods showcase stunning purple stripes reminiscent of a rattlesnake's skin, but they also offer versatile culinary uses. Easy to Grow: Your Guide to Planting Rattlesnake Beans As a home gardener, what could be better than a resilient and productive plant? Rattlesnake pole beans thrive when directly seeded in your garden beds or containers. Their tall, vining nature means you can capitalize on vertical gardening, taking up minimal ground space while growing upwards of 8 to 10 feet tall. Make sure to plant them in locations that receive at least 6 to 8 hours of sunlight daily, and ensure the soil temperature sits at a warm 60 degrees Fahrenheit (15 degrees Celsius) before sowing your seeds. Timing your planting correctly is essential. It’s advisable to wait until after the last frost before planting. From seed to harvest, plan for approximately 65 days—making them an excellent summer crop. To prolong your harvest, consider succession planting, where you sow a second round of beans about a month after the first. This technique not only extends your harvest window but also ensures a continuous supply of fresh beans throughout the summer. How to Successfully Support Your Beans Unlike bush beans, rattlesnake pole beans require effective support structures to thrive. Various options can accommodate their climbing habit, such as A-frame trellises, vertical trellises, or even simple teepees constructed from garden stakes. The key is to set up these supports before planting to avoid disturbing the young plants later on. When planting, consider spacing your seeds about three inches apart and an inch deep, carefully situated at the base of your chosen support. By giving your plants room to grow, you’ll create an environment that maximizes their yield while simplifying maintenance. Caring for Your Rattlesnake Pole Beans Rattlesnake pole beans are renowned for their low maintenance needs. Once they've germinated, your primary job is to keep the soil consistently moist without overwatering. These beans are not only forgiving but are also nitrogen fixers, helping to enrich your soil for future planting endeavors. Some gardeners choose to inoculate their seeds with beneficial microbes to enhance growth further. This step, while optional, can lead to even more substantial yields. Keeping the area weed-free and providing adequate water during dry spells will ensure your plants remain healthy and productive. Harvesting Tips: When to Pick Your Beans Timing is crucial when it comes to harvesting your rattlesnake pole beans. For the best taste, aim to collect the pods when they reach between 5 to 8 inches in length. At this stage, the beans are still tender and ideal for cooking or eating fresh. With a harvest window that can last for five to six weeks, these beans will provide you with ongoing rewards throughout the summer months. Embrace the Visual Beauty: Beans That Please the Eye One of the undeniable joys of growing rattlesnake pole beans is not merely the flavor but also their striking appearance. The patterned pods add an aesthetic appeal to your garden, elevating the visual experience. Additionally, even the matured beige seeds with dark spots offer another level of beauty, perfect for saving and sharing with fellow gardening enthusiasts. Conclusion: A Rich Addition to Your Gardening Journey As you embark on your journey of growing rattlesnake pole beans, remember the rewarding experience that awaits. From the delightful ease of planting to the vivid visual glory they bring to your garden, these beans are a wonderful way to engage with the earth. Consider succession planting for a continuous harvest, and enjoy the multifaceted rewards as you cultivate, care for, and consume. Ready to enhance your garden this summer? Spice things up with some rattlesnake pole beans and watch your vegetable garden flourish!

06.29.2025

Enhance Your Garden with Purple Sprouting Broccoli: A Must-Grow Delight

Update Why Grow Purple Sprouting Broccoli? Purple sprouting broccoli isn’t just a beautiful addition to your garden; it’s a flavorful and nutritious vegetable that thrives in cooler weather. Known for its unique purple hue and tender texture, this broccoli variety grows multiple side shoots instead of a single head, offering a fresh take on traditional broccoli. It’s an ideal option for gardeners looking to diversify their harvest. Understanding the Unique Growth Cycle This unique vegetable requires specific growth conditions to truly flourish. Unlike standard broccoli, purple sprouting broccoli demands a vernalization period — 6 to 8 weeks of temperatures below 50°F. This exposure conditions the plant to produce shoots rather than just leaves; hence, successful growers usually reside in climates where winter lows hover between 15°F and 40°F. Understanding this growth requirement is crucial to achieve a successful harvest. The Perfect Planting Timing The best time to plant purple sprouting broccoli is in the late summer or early fall. This timing allows the plants to become established before the onset of frost, thus making full use of the cool growing season. Harvest typically occurs from late February to April, just in time when other fresh produce may be sparse. By incorporating this vegetable into your gardening schedule, you can extend your harvest season. Benefits of Growing Purple Sprouting Broccoli Beyond the aesthetic appeal and unique taste, purple sprouting broccoli boasts impressive health benefits. Rich in anthocyanins, this antioxidant-rich vegetable supports immune health and may even enhance cognitive function. Adding this versatile broccoli to your diet is easy — enjoy it raw in salads, lightly steamed, or sautéed as a colorful side dish. Simple Steps to Cultivate this Broccoli Growing purple sprouting broccoli is straightforward, yet requires attention to detail. Here’s how to ensure you reap a bountiful harvest: Soil: Well-draining, nutrient-rich soil is essential. Amend with compost for the best results. Spacing: Provide ample space between plants to encourage air circulation and proper growth. Watering: Keep the soil consistently moist but not soggy. Regular watering will promote robust growth. Fertilization: Use a balanced fertilizer to support healthy plant development throughout the growing season. Harvesting Tips for the Best Flavor To achieve the best flavor, begin harvesting the central head first when it reaches about 3 to 5 inches in diameter. Once the head is cut, the plant will produce additional side shoots that can be harvested over several weeks. It’s best to enjoy the florets fresh to appreciate their unique colors and flavors; however, cooking does turn them green — slightly diminishing their vibrant hue, but not their taste! Conclusion: Transform Your Garden with Purple Sprouting Broccoli Growing purple sprouting broccoli can bring numerous benefits to your garden and table. With its nutritional advantages, visual appeal, and suitability for cooler climates, it's the perfect vegetable for anyone wanting to bolster their home garden. Start planning for this exceptional crop today; you won’t regret the flavors and variety it brings. If you’re ready to dig your hands into the soil and enrich your diet, why not start your journey with purple sprouting broccoli? Your garden—and your tastebuds—will thank you!

06.28.2025

Unlock the Secrets of Planting Lavender Seeds or Seedlings in Your Garden

Update The Beauty and Benefits of Lavender in Your Garden Lavender is more than just a beautiful addition to your home garden; it's a multitasking marvel. Known for its intensely fragrant flowers, which bloom from early to late summer, lavender is a favorite among gardeners. Not only does it beautify spaces, it serves as a natural pollinator attractor, bringing bees, butterflies, and other beneficial insects into your yard. Beyond its aesthetic appeal, lavender boasts therapeutic benefits, with its scent often used in aromatherapy to promote relaxation and reduce stress. Understanding When to Plant Lavender: The Perfect Timing For homeowners eager to cultivate lavender in their gardens, timing is key. Planting should typically occur in the spring after the last frost, allowing the young seedlings to acclimate to their environment without the risk of frost damage. However, the optimal planting time can vary by region and depends on the specific type of lavender being planted. If you’re considering growing lavender from seeds, it’s essential to start them indoors approximately 6 to 8 weeks before the last expected frost date in your area. This is especially important for varieties like English lavender (Lavandula angustifolia), which needs that head start to thrive once transferred outdoors. The Different Types of Lavender to Consider Before planting, familiarize yourself with the various types of lavender to select the best fit for your garden. Here are the most popular varieties: English Lavender (Lavandula angustifolia) - Thriving in USDA zones 5 to 8, this classic garden plant is cherished for its hardiness and stunning blooms ranging from lavender to deep purple. Hybrid Lavender (Lavandula x intermedia) - A robust choice that thrives in cooler and warmer climates, this hybrid offers lovely mid to late summer flowers. Spanish Lavender (Lavandula stoechas) - Ideal for warmer climates, it’s known for its unique bract-topped flowers and drought resistance, making it perfect for patio gardening. French Lavender (Lavandula dentata) - It offers a long bloom season but is less fragrant than its English counterpart. For gardeners in colder regions, consider it as a tender annual. Preparing Your Garden for Lavender To ensure your lavender thrives, consider the following tips before planting: Location, Location, Location: Choose a spot that receives full sun for at least 6 to 8 hours a day. Soil Quality: Ensure well-draining soil, as lavender dislikes standing water. Amend your garden soil with sand or gravel if necessary. Spacing: Space your plants appropriately to allow air circulation, which is crucial for preventing diseases. Planting Techniques for Successful Growth Once you've selected the ideal location and prepared your soil, planting lavender can be as simple as following these steps: Dig a hole that is twice the size of the plant’s root ball. Loosen the roots gently to encourage outward growth. Position the plant, ensuring that the base of the stem is level with the soil surface. Water thoroughly after planting and apply a light layer of mulch if necessary, but avoid covering the stems. Future Predictions: The Lavender Growing Trend As more homeowners seek low-maintenance yet stunning plants, lavender’s popularity is only expected to grow. Its various uses—from culinary herbs to natural pest deterrents—make it an attractive plant for modern gardeners. Additionally, lavender farming is becoming more mainstream, not just for home gardeners but also for commercial purposes, with many exploring the potential of lavender oils and products. Conclusion: Embrace Lavender in Your Garden Adding lavender to your gardening repertoire can elevate your garden's aesthetics while providing a habitat for pollinators and a means for relaxation. Given its resilience and versatility, why not start a lavender garden today? Whether you're using seeds or seedlings, understanding the right planting methods and timing is crucial for a thriving garden. Don't overlook the joy that this beautiful herb can bring. Start planning your lavender garden now and enjoy the journey!

Add Row
Add Element
cropper
update
Home Service Hub
cropper
update

Homeowners seeking trusted advice and resources for maintaining and improving their properties

  • update
  • update
  • update
  • update
  • update
  • update
  • update
Add Element

COMPANY

  • Privacy Policy
  • Terms of Use
  • Advertise
  • Contact Us
  • Menu 5
  • Menu 6
Add Element

949-375-3833

AVAILABLE FROM 8AM - 5PM

Huntington Beach, CA

18685 Main Street 101-228
Huntington Beach, CA 92648

Add Element

ABOUT US

Home Service Hub is a subsidiary of High Octane Digital Group.

Add Element

© 2025 CompanyName All Rights Reserved. Address . Contact Us . Terms of Service . Privacy Policy

Terms of Service

Privacy Policy

Core Modal Title

Sorry, no results found

You Might Find These Articles Interesting

T
Please Check Your Email
We Will Be Following Up Shortly
*
*
*